
It's Ruby's birthday next month so I've been having a trial run of something I want to make for her party bags. That's if I do a party - after last year I'm not sure I can face it! If not, I will make these as birthday treats for her to take into nursery for her friends. The custom is to take sweets or cake in, but I think these are nicer.
They'd also make nice Easter gifts, an alternative to Easter eggs and it means giving something that will last and last.
 |
| A long-lasting gift to plant & enjoy the flowers |
I experimented and made this up as I went along, but I'm really happy with the end results. It's a great craft that kids can join in with, it's perfect for spring time and it's practically free!
 |
| These go in the ground not in your mouth! |
You will need:
Newspaper
Seeds
Cookie Cutters or shaped silicone ice cube moulds/cake tins
A blender
Sieve
Natural food dye (optional)

1. Tear up the newspaper into pieces. You don't need to be precise but try not to make them bigger than a couple of inches.

2. When you have a nice lot of newspaper pieces, pop them in the blender a couple of handfuls at a time. Add some water. Judge this by eye, but it's better to have the mix too wet than too dry as you are going to squeeze the excess out anyway. If it's too dry or you put too much paper in, you risk jamming your blender. Give it a good blitz until you have a pulp. Work in batches, transferring the pulp you make into a sieve resting over a bowl. If you don't have a blender (or if you think your motor won't cope!) you can do this by hand in a bowl but you will need to tear your paper up into teeny tiny pieces first then mix and squidge together with water.
3. If you want to add food colouring, now is the best time to do it. We weren't able to get an even distribution of colour throughout the mixture and I tried it at various stages. But if you put a few drops onto your wet pulp now and squidge it in your hands, you'll get a hint of colour (and also on your hands!). Remember, these are to be planted so don't use chemical colourings.
4. Squeeze out the excess liquid. Get as much out as you can.

5. Add your seeds. I used one pack to make six large 'cookies'. We chose wildflowers as these are gifts for young children so I didn't want any complicated growing instructions. Thompson and Morgan have a trial price on their meadow flowers at the moment of only 99p. You can find them in garden centres, or try Wilkinson's and pound stores for cheap seeds. Vegetable seeds would be great too, especially if you match the shapes to the produce.

6. Next fill your cookie cutter shapes with the seed mixture. We chose butterfly and bee shapes because that's what we hope the flowers will attract. You might find it useful to stand the cutters on some kitchen paper to absorb any liquid that will be squeezed out. Push the pulp down very firmly.

7. Carefully push out your shaped pulp from the cutter, and leave on some greaseproof paper in a warm place to dry. You want them to dry quickly so the seeds don't start to germinate.

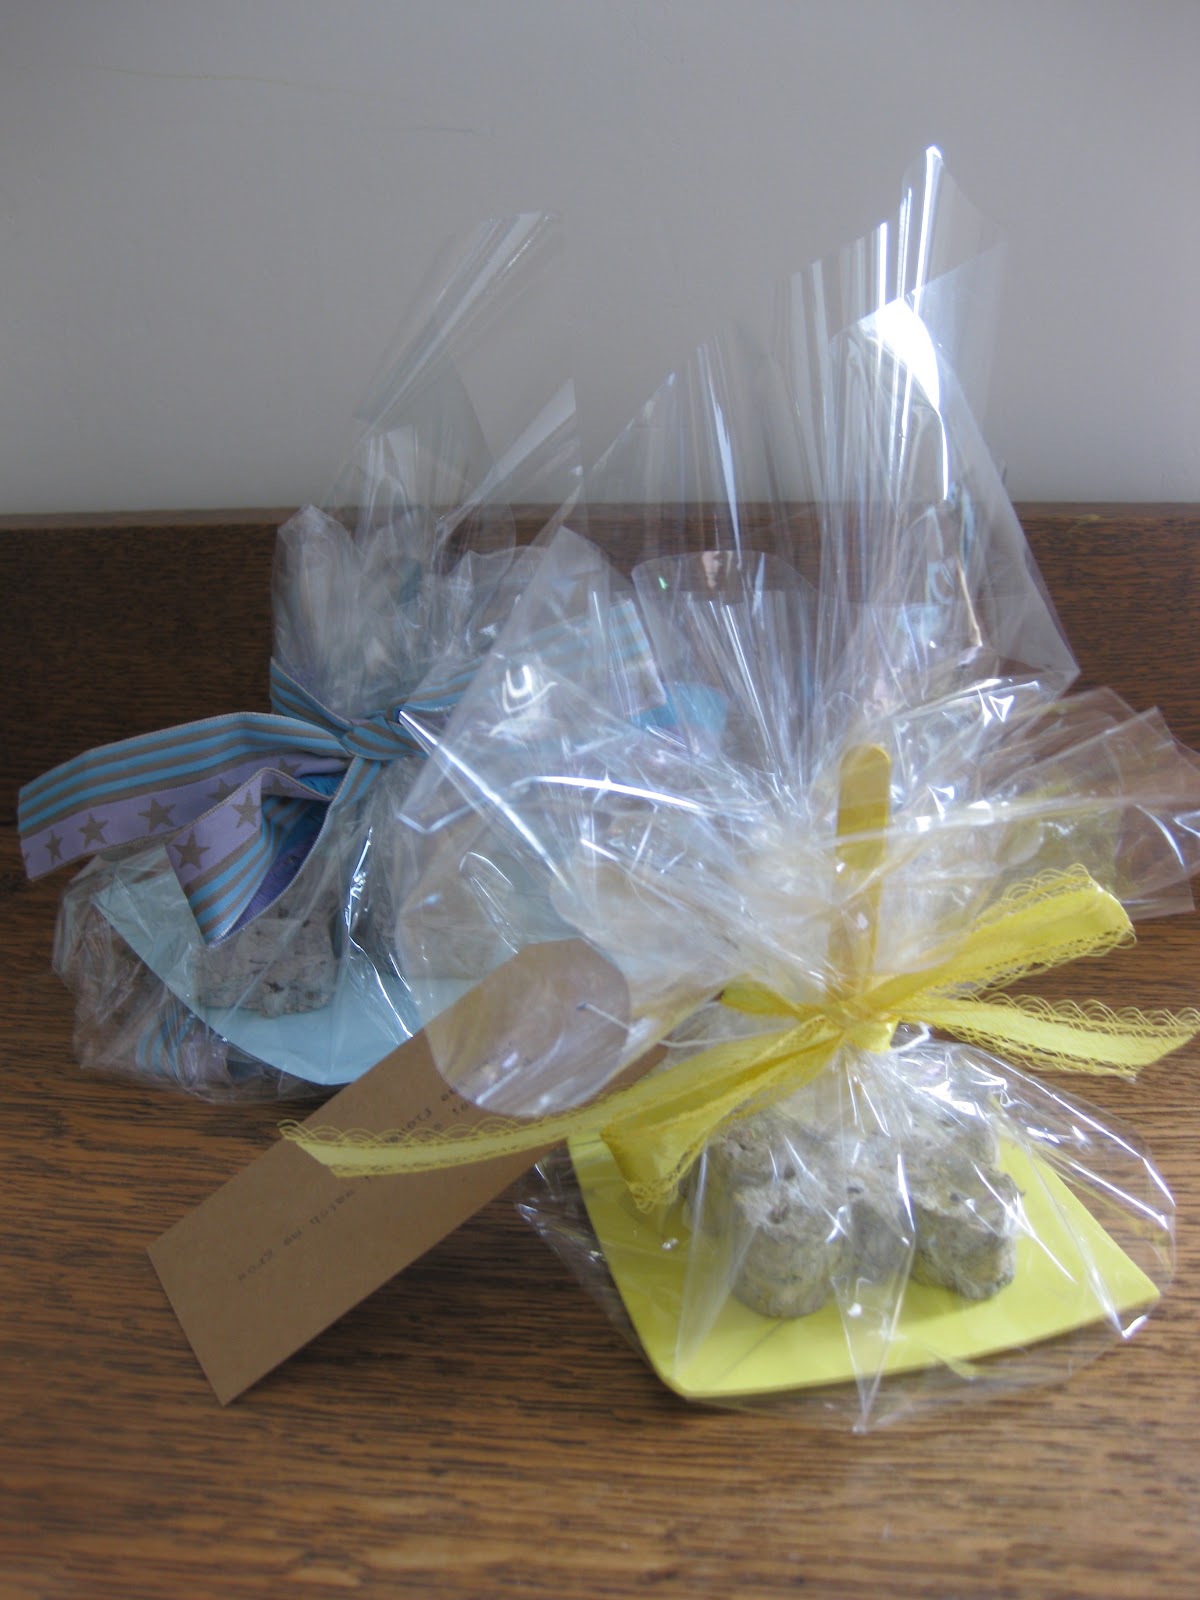
8. Once fully dry (ours took about 24 hours), wrap up in pretty packaging. I placed a seed cake on a piece of card to keep it stable, added a lolly stick so the planter can remember where they put them, and wrapped in cellophane salvaged from a bouquet of flowers. Add a pretty ribbon and a label and you're done.


Oh gosh they're fab!! x
ReplyDeleteThanks my dear. Great messy fun to make too!
DeleteLove this idea, what a great alternative to sweets and educational to boot. x
ReplyDeleteThank you. She loves to grow things, so I think her little friends will too :0)
DeleteWhat an absolutely lovely, lovely idea!
ReplyDeleteThank you. I'm really pleased with how they turned out.
DeleteWe make these and pop them on to cards for Easter
ReplyDeleteAhh that's a great idea Jen. But damn! There was me thinking I'd had an original idea! LOL
DeleteBrilliant idea: did you get good practice with those fridge magnets you made a couple of weeks ago?
ReplyDeleteHaha yes! That's what gave me the idea!
DeleteOne day I might actually make ice cubes with my trays and cookies with my cutters!
You are really good at this sort of thing.
ReplyDeleteLOL! Not really, we just like to play :0)
DeleteI love, love, love these Liz. Did you see the programme Superscrimpers on TV last night? It was dreadful, and all I could think was why has Liz not got her own series you would beat that one hands down.
ReplyDeleteAhh bless you Molly! No I still haven't seen that programme. Think it would be right up my street, must try to catch up.
DeleteOh, and welcome back to the interweb, you've been missed x
I wouldn't bother, their ideas are really lame and predictable, unlike your creative and imaginative ones.
DeleteHey, I missed you too! x
What a brilliant idea! They look so pretty. I'm looking for baking alternatives as I just eat the results and this is such a good idea.
ReplyDeleteAhh thanks. I was wondering if I should put a disclaimer on here somewhere. Some seeds are poisonous. But no-one would be dumb enough to eat them. Right?!
Deletex
These are very cool, a great idea, and a great way of getting kids into gardening :-)
ReplyDeleteThanks Techno-mole. Yep, Ruby loves growing plants. We've got some more activities coming soon, but hopefully these will encourage her friends to as well. x
DeleteLove love love these, brilliant party bag idea. We'll definitely be making some. :)
ReplyDeleteThank you, that's great to hear. I wanted to make seed paper for her bags last year but ran out of time. Also I didn't have the equipment, mesh frames etc. These are great because most people have got all the stuff in the kitchen anyway. Let me know how they turn out x
DeleteOh my! How adorable!! Be sure to keep one and take a photo of it all in bloom.
ReplyDeleteLovely craft idea!
Thank you for sharing on Kids Get Crafty!
Maggy
Thanks Maggy. We will do, we have the perfect spot to plant it!
DeleteBrilliant post! I'm definitely using this one as an alternative Easter gift.
ReplyDeleteThanks Cara. Let me know how they turn out :0)
DeleteWhat a fab idea. x
ReplyDeleteThanks hun x
DeleteWhat a brilliant idea!!!!! Might have to steal this idea if that's OK?!! Such a nice change from sending in sweets!
ReplyDeleteCourse! We've got to get working on our next batch if we're going to do enough for the whole class!
DeleteBrilliant!! I love it :)
ReplyDeleteThanks Shaz x
DeleteWhat a fantastic idea, you are clever. Have shown people I work with and they agree
ReplyDeleteThanks Mamabear. That's a bit alarming - who do you work wth?! LOL
DeleteOh this is brilliant, I am definitely going to give this a go. I only have a hand blender though, I wonder if it can cope with it?
ReplyDeleteI'll send the link to my Dad, as he will love it!
Thanks Gidders. I don't know about a hand blender - do you mean a stick blender? Like you use for soup? It should do.
DeleteYou can do it by hand but it would take ages tearing the paper up really small. Hope you find a way x
What a wonderful idea!
ReplyDeleteThis is a really lovely idea, thanks for sharing!
ReplyDeleteLove the idea, and thanks for entering the Blog post of the month again ;)
ReplyDeleteI've never done anything like this. Will this damage my blender?
ReplyDeleteHi, it shouldn't do if you do a small amount at a time and add plenty of water. x
DeleteI love this idea - I don't have a blender just a hand blender I guess this could be ummmm.... interesting but I've got to try it. Do you know whether it's possible using the traditional none blender methods of making paper?
ReplyDeleteThank you for this idea. We tried it out for mother's day!
ReplyDeleteLaurie
Chickadee Jubilee
Ahh that's great to hear, thank you x
DeleteReally like this idea and would like to try it as part of a community gardening project with kids - with your agreement first. Happy to give you the credit for the same too.
ReplyDeleteHi Fiddlesticks!
DeleteThat makes me happy, I'd be thrilled if you did.
You might also like my seed bomb eggs x http://missielizzie-meandmyshadow.blogspot.co.uk/2013/02/how-to-make-seed-bomb-easter-eggs.html
No longer does a music lover need to bother about traveling out of range when a
ReplyDeletefantastic song comes on over the vehicle radio. Much of your best players marketplaces in the united states
are supervised. Yours Truly, Johnny Dollar: The Duke
Red Matter (Part One; CBS, 1956)'Abbott Stables's Duke Red is a thoroughbred destroyed over a serious injury in an
accident, and Dollar (Bob Bailey)'asked to review a $65,000 insurance claim on the horse'smells trouble when the stable's business manager is dismissed after filing the claim, and its veterinarian may have destroyed the horse a little too swiftly.
Here is my web-site - radio control submarine review
Just brilliant. Gonna do this very soon!
ReplyDeleteMy sons playgroup are hosting a stall at our local farmers market and these look like they would be ideal for the children to make! (If you don't mind us stealing your idea)
ReplyDeleteWould it work with regular shredded paper or does it have to be newspaper?
Thanks
Susan x